
Deleting an important file can create instant panic. Maybe you emptied the Recycle Bin before noticing an important folder was inside. Perhaps an external hard drive suddenly became unreadable. Or Windows is asking you to format a USB drive that contained files you still need.
The most important thing at this point is not to rush.
When a file is deleted, its data may remain on the storage device until Windows writes new information over the same space. This is why your actions immediately after discovering the loss can have a major impact on whether recovery succeeds.
EaseUS Data Recovery Wizard is designed to search storage devices for deleted, formatted, inaccessible, and otherwise lost files. It supports common recovery situations involving internal drives, SSDs, USB drives, memory cards, and external hard drives.
This masterclass explains how to use EaseUS Data Recovery Wizard from the moment you notice that your data is missing through scanning, filtering, recovery, and checking the recovered files.
We will also cover more difficult situations, including formatted partitions and computers that can no longer boot normally.
Quick Overview: How EaseUS Data Recovery Works
Before starting, it helps to understand what the software actually does.
When you delete a file, the operating system does not necessarily erase every piece of its data immediately. Instead, the storage space occupied by the file may be marked as available for future use.
Recovery software searches the drive for information that can still be reconstructed.
A typical EaseUS recovery session follows this process:
- Stop using the affected storage device.
- Install EaseUS Data Recovery Wizard on a different drive when possible.
- Select the location where the files disappeared.
- Start the scan.
- Filter the results.
- Preview recoverable files.
- Select the files you need.
- Recover them to another storage device.
- Open and verify the recovered files.
The first and last points are just as important as the scan itself.
Phase 1: Prevention Before You Attempt Recovery
Stop Using the Drive Immediately
The first rule of data recovery is simple:
Do not write additional data to the affected drive.
Suppose you accidentally delete a 2 GB video folder from your D: drive.
You then continue using the computer and:
- Download a large game.
- Install several programs.
- Copy photographs to D:.
- Download Windows updates.
- Edit large video projects.
Some of that new information could overwrite storage areas previously occupied by your deleted videos.
Once the original data has been overwritten, normal recovery software may no longer be able to reconstruct it.
Therefore, stop unnecessary activity on the affected storage device as soon as you notice the loss.
Do Not Format an Unreadable Drive
Windows may display messages such as:
“You need to format the disk in drive E: before you can use it.”
Do not automatically click Format disk.
A drive becoming unreadable does not necessarily mean the files have disappeared. The file system or partition information could be damaged while portions of the underlying data remain recoverable.
Scan the device before making unnecessary changes to it.
Do Not Install EaseUS on the Affected Drive
Imagine your deleted files were stored on your Windows C: drive.
Installing recovery software to C: creates new files on the same drive you are trying to recover.
That creates an avoidable overwrite risk.
When practical, install EaseUS on another drive or use another computer for removable storage devices.
For example:
Lost data: External USB drive
Install EaseUS: Computer’s internal drive
Recovered files: Different external drive
For an internal secondary drive:
Lost data: D: drive
Install EaseUS: C: drive
Recovered files: External drive
The important rule is that the recovery destination should not be the same location you are recovering from.
Be Especially Careful With SSDs
Deleted-file recovery from SSDs can be more complicated than recovery from traditional hard drives.
Modern SSDs commonly use TRIM, which allows the operating system to tell the SSD that certain blocks are no longer required. Depending on the system and what has happened since deletion, this can make deleted data difficult or impossible for software to recover.
Therefore, if an important file disappears from an SSD, minimize further activity immediately.
Phase 2: Installing and Setting Up EaseUS Data Recovery Wizard
Step 1: Download EaseUS Data Recovery Wizard
Go to the official EaseUS website and find Data Recovery Wizard for your operating system.
Download the installer.
Avoid downloading modified copies from unknown third-party websites. Data recovery is already a sensitive process, so there is little reason to introduce questionable installers into the situation.
Step 2: Choose the Installation Location Carefully
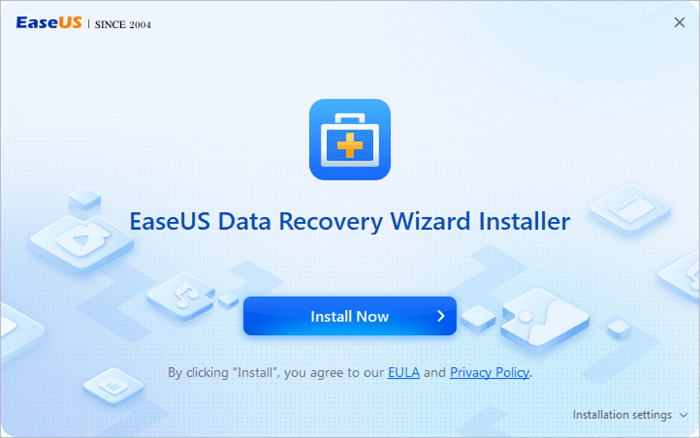
Launch the installer.
Before continuing, check where EaseUS will be installed.
If you are trying to recover deleted data from C:, avoid installing the program to C: when you have a practical alternative.
If your lost files are on an external hard drive, installing EaseUS normally on your computer’s internal drive is generally fine because the affected storage device is separate.
Follow the installation prompts and wait for setup to complete.
Then launch EaseUS Data Recovery Wizard.
Step 3: Connect the Affected Storage Device
If you are recovering data from removable storage, connect it before beginning the scan.
EaseUS can be used with storage devices such as:
- Internal hard drives
- SSDs
- External HDDs and SSDs
- USB flash drives
- SD cards
- microSD cards through a suitable reader
- Other storage devices recognized by the computer
Give Windows a moment to detect the device.
If Windows recognizes the physical drive but cannot open its contents normally, EaseUS may still be able to scan it.
If the storage device is not detected by the computer at all, however, the problem could involve the cable, enclosure, controller, power supply, or physical hardware rather than ordinary file deletion.
Phase 3: The EaseUS Scan Process
This is where the actual recovery process begins.
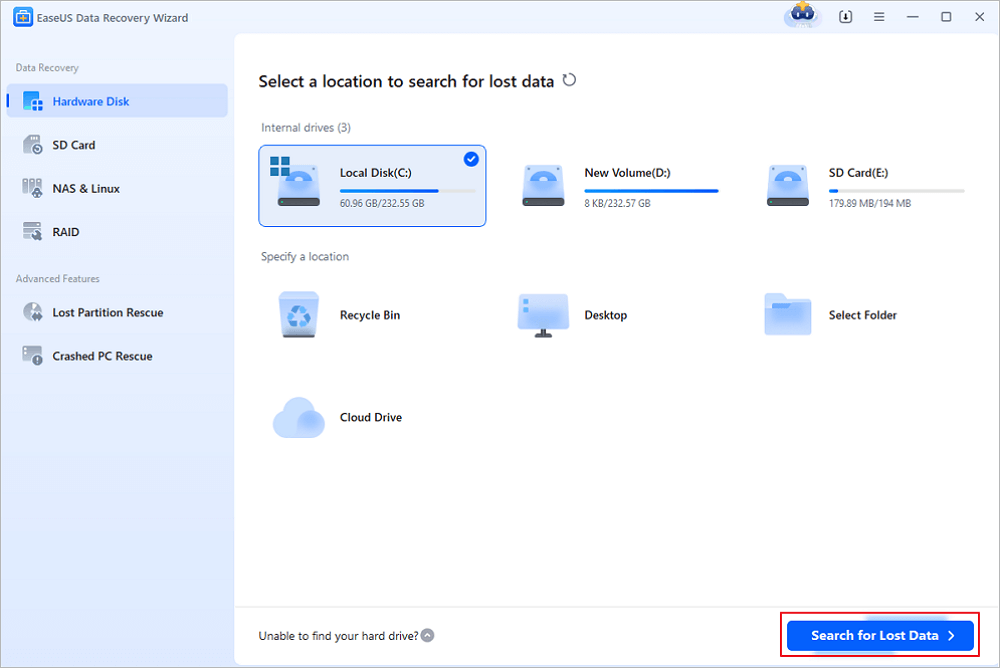
Selecting the Location to Scan
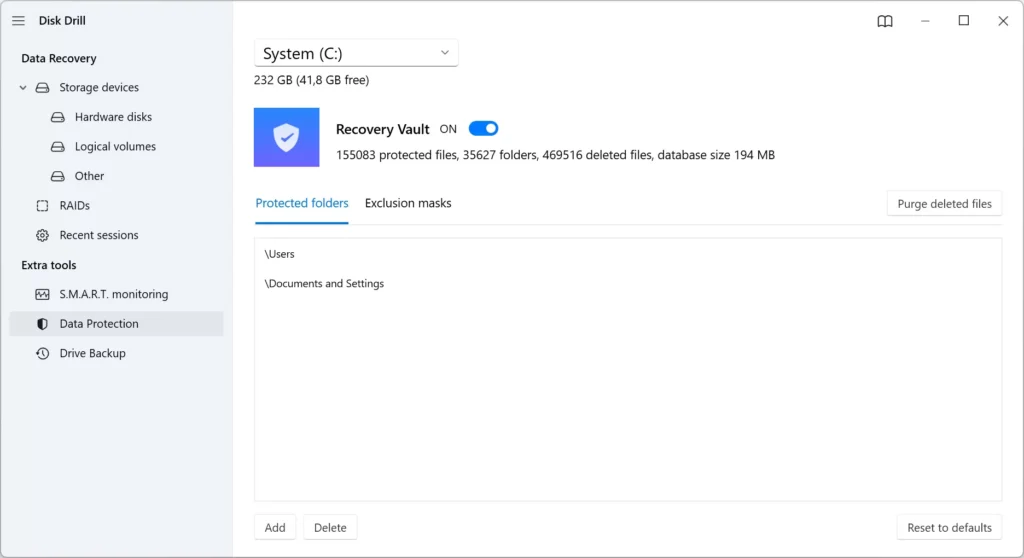
Open EaseUS Data Recovery Wizard.
The main interface should show available disks, partitions, and other recovery locations recognized by the software.
Identify where your missing files were originally stored.
For example:
- Deleted Desktop file: select the appropriate system location or drive.
- Missing folder from D:: select D:.
- Deleted photos from SD card: select the SD card.
- Formatted USB drive: select the USB device.
- Files lost from external HDD: select the external drive.
Take your time here.
Scanning the wrong location will waste time and may leave you thinking the files cannot be recovered.
Select the appropriate drive or location and start the Scan.
Scanning for Lost Data
EaseUS will begin searching the selected storage location.
Depending on the drive’s capacity, interface speed, condition, and amount of data, the process can take anywhere from several minutes to considerably longer.
During the scan, EaseUS may begin displaying discovered files before the entire process finishes.
You can inspect these results, but when the missing data is important, it is usually worth allowing the complete scan to finish.
A quick result does not necessarily mean EaseUS has found everything available.
The deeper part of the scan can locate additional data structures and files that were not immediately visible.
Should You Stop the Scan Early?
Only stop early if you have already found exactly what you need and have a good reason not to continue.
For difficult cases involving formatting, damaged partitions, or large deleted folders, allow the scan to complete.
The extra time can be worthwhile.
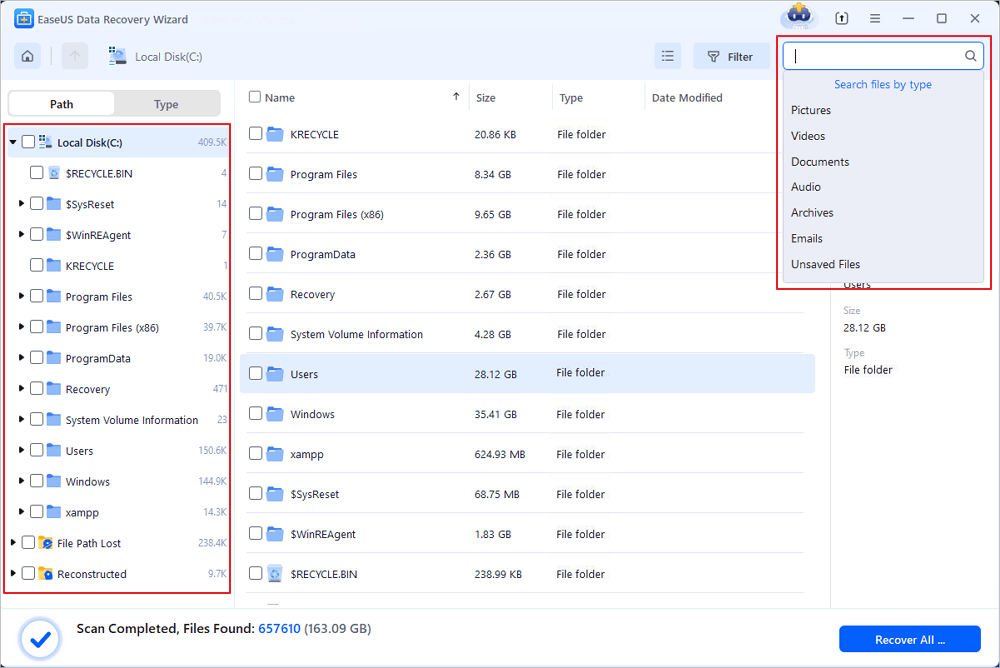
Filtering the Scan Results
A 1 TB hard drive could produce thousands or even millions of scan results.
Opening folders one at a time would be painfully slow.
Instead, use EaseUS’s filtering and search tools.
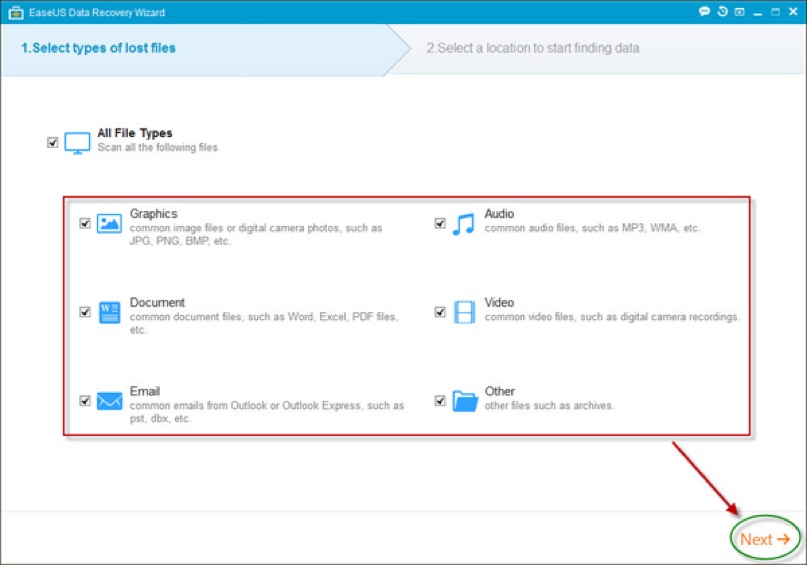
Depending on the version, you may be able to narrow results using categories such as:
- Pictures
- Documents
- Videos
- Audio
- Emails
- Archives
- Other file types
If you know the filename, use the search field.
For example, searching for:
invoice
may be much faster than manually browsing thousands of Word and PDF files.
You can also narrow the results based on relevant file properties where available.
Filter by File Type
If you lost photographs, focus on image formats such as:
- JPG
- JPEG
- PNG
- TIFF
- RAW camera formats
For business documents, look for formats such as:
- DOC
- DOCX
- XLS
- XLSX
- PPT
- PPTX
Filtering can dramatically reduce the number of files you need to inspect.
Selecting the Files You Want to Recover
Once you have located the required files, select the checkboxes next to them.
You do not necessarily need to recover every file found during the scan.
If you only need ten photographs, select those ten photographs.
For a deleted folder, select the folder if EaseUS has successfully reconstructed its structure.
Double-check your selection before proceeding.
Recovering the Selected Files
Click the Recover button.
EaseUS will ask you to choose where the recovered files should be saved.
This decision matters.
Do not save recovered files back to the same drive you are recovering from.
For example:
If recovering from:
E:\Damaged Drive
save the results to something like:
F:\Recovered Files
or another healthy storage device.
Why?
Because writing recovered files back to the damaged or deleted-data source can overwrite other files that have not yet been recovered.
Choose the destination and confirm the recovery operation.
Wait until EaseUS finishes copying the available data.
Phase 4: Advanced EaseUS Recovery
Basic accidental deletion is only one recovery scenario.
EaseUS can also be useful when dealing with more complicated storage problems.
Recovering Files From a Formatted Partition
Formatting does not always mean that every byte of old data has immediately disappeared.
The chances of recovery depend heavily on:
- Type of format performed
- File system
- Storage technology
- Whether new data has been written
- SSD TRIM behavior
- Condition of the drive
If you accidentally formatted a partition, stop using it immediately.
Open EaseUS and locate the formatted drive or partition.
Select it and begin the scan.
Allow the entire scanning process to complete.
Then use the filtering tools to search for your important data.
Do not be surprised if some recovered files no longer have their original filenames or directory structure. File system metadata can be damaged or overwritten even when portions of the actual file content remain.
Preview the most important files before recovery and save the recovered copies to another physical storage device.
Recovering Data When Windows Will Not Boot
A more serious situation occurs when the computer itself will not start.
Perhaps Windows crashes during startup, system files are damaged, or the system partition has become inaccessible.
You may still need files stored on the machine.
This is where bootable recovery media can become useful.
Creating a WinPE Bootable Recovery USB
EaseUS offers bootable recovery functionality with supported editions/features, allowing you to create recovery media based on Windows PE.
You will generally need:
- Another working Windows computer
- A USB flash drive
- The appropriate EaseUS edition/license that includes bootable media functionality
- A separate drive on which to save recovered data
Connect the USB drive to the working computer.
Open the EaseUS bootable media creation option.
Select the USB device and follow the instructions to create the WinPE bootable disk.
Be careful here because preparing bootable media can erase existing data on the USB drive.
Use an empty USB drive or back up anything important first.
Booting the Failed Computer From USB
Insert the newly created recovery USB into the computer that will not boot.
Turn on the computer and enter its boot menu or UEFI/BIOS interface.
The required key varies by manufacturer but commonly includes keys such as:
F2, F12, Esc, or Delete.
Select the USB device as the temporary boot device.
The computer should start from the recovery environment rather than the damaged Windows installation.
Launch the available EaseUS recovery environment.
Scanning the Internal Drive
Once EaseUS loads, identify the internal drive containing your lost files.
Start the scan.
Use the same principles as before:
- Allow the scan to run.
- Filter results.
- Search for important filenames.
- Preview files where possible.
- Select the files you need.
- Recover them to a separate external drive.
Do not recover the files onto the failing system drive.
What If the Hard Drive Is Physically Damaged?
Software has limits.
If your hard drive:
- Makes clicking or grinding noises
- Constantly disconnects
- Is not detected by BIOS/UEFI
- Has suffered fire or water damage
- Does not spin up
- Causes the system to freeze repeatedly
continuing to scan it may not be the best choice.
Important business files, family photographs, cryptocurrency-related data, or other irreplaceable information can justify professional data recovery.
Recovery software primarily addresses logical data loss. It cannot repair every mechanical or electronic failure.
Troubleshooting FAQ
1. EaseUS Cannot Find My Deleted File. What Should I Do?
First, allow the full scan to finish.
Then search by filename and filter by file type.
Also inspect files whose original names are missing. File metadata can disappear even when file content remains recoverable.
If nothing appears after a complete scan, the original data may have been overwritten, removed through SSD TRIM, or otherwise become unavailable to software recovery.
2. Can EaseUS Recover Permanently Deleted Files?
Potentially.
Files deleted with Shift + Delete or removed after emptying the Recycle Bin may still be recoverable if their underlying data has not been overwritten or otherwise discarded.
The sooner you stop using the drive and attempt recovery, the better.
3. Can EaseUS Recover Files After Formatting?
It can recover data from some formatted storage devices, but success is not guaranteed.
Recovery depends on the formatting method, storage type, subsequent writes, file system, and physical condition of the device.
Avoid writing anything new to the formatted drive before scanning it.
4. Why Are My Recovered Files Corrupted?
A recovery program may locate information about a file even when portions of its data have already been overwritten or damaged.
This can produce:
- Photos that only partially display
- Documents that refuse to open
- Videos that freeze
- ZIP archives with extraction errors
Try other discovered versions of the same file if EaseUS shows multiple candidates.
5. Why Does the EaseUS Scan Take So Long?
Scanning time depends on several factors, including:
- Drive capacity
- USB/interface speed
- Amount of stored data
- Number of files
- File system condition
- Drive health
- Depth of the scan
A large external HDD can naturally take much longer than a small USB flash drive.
Best Practices for Better Recovery Results
Successful data recovery is not only about clicking Scan.
What you do before and after the scan matters just as much.
Keep these rules in mind:
- Stop using the affected drive immediately.
- Do not install recovery software on the source drive when avoidable.
- Do not format an unreadable drive before attempting recovery.
- Allow the complete scan to finish for difficult cases.
- Use filters and search rather than manually browsing thousands of results.
- Preview important files before recovering them when possible.
- Recover files to a different storage device.
- Check recovered files for corruption.
- Create a fresh backup after successful recovery.
- Seek professional help when physical hardware failure is suspected.
Final Thoughts: How to Use EaseUS Data Recovery Correctly
Learning how to use EaseUS Data Recovery Wizard is relatively straightforward. The more important skill is understanding how to protect recoverable data while using it.
If you accidentally delete a file, format the wrong partition, lose access to a USB drive, or discover that Windows no longer boots, avoid making unnecessary changes to the affected storage device.
Start by protecting the original data.
Install or run your recovery tools from a safe location, select the correct drive, complete the scan, narrow the results with Search and Filter, preview the important files, and then click Recover.
Most importantly, save recovered data to a different drive.
For advanced cases, a bootable WinPE recovery environment can provide another route when the normal Windows installation cannot start. But recovery software has limits. Physically damaged drives and overwritten data require a different approach, and no recovery application can guarantee that every lost file will return intact.
Once your files are recovered, open them and verify their contents rather than assuming that a successful recovery message means everything is healthy.
Then make a backup.
The best data recovery session is the one you never have to repeat.